Outdoor photogrammetry is one of the most accessible forms of 3D scanning and can be done by anyone with a camera. With free unlimited sunlight all you need is photogrammetry software and an object you can walk around to photograph at different angles.
As simple as it may seem, scanning objects outdoors can be a long and tedious process with many opportunities for poor results and failure.
If you’re a 3D artist just getting started with outdoor photogrammetry then this part of our guide to 3D scanning is for you. We took our own experience with scanning tree bark for HyperTrees and put together the following 15 tips to help you avoid common problems and get the best possible outdoor scans.
1. Avoid Sunny Days
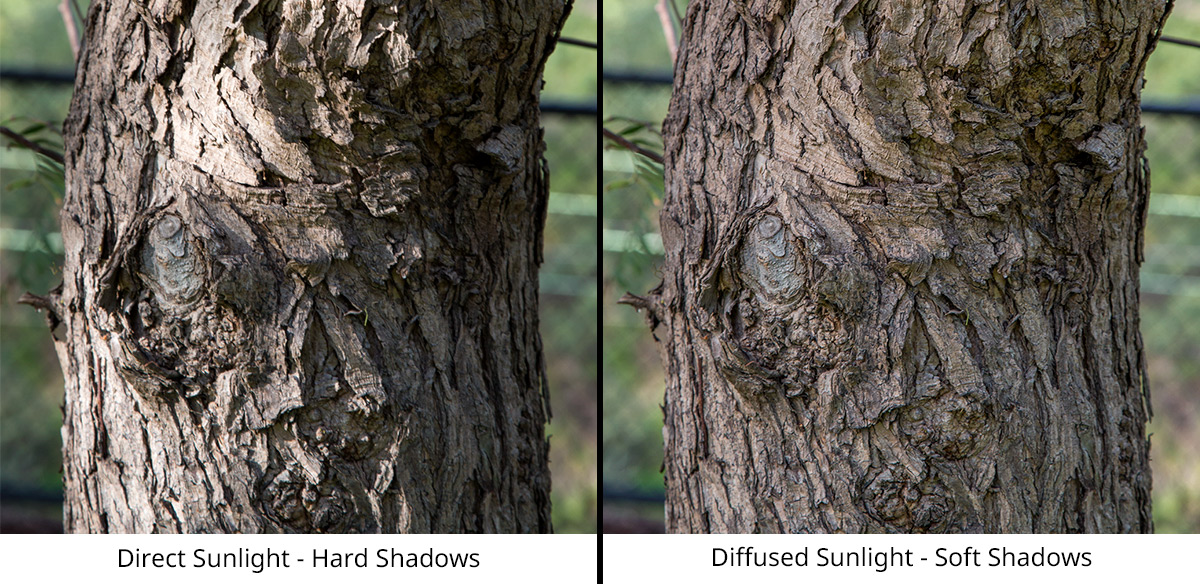
The key to getting the most consistent results with any 3D scan is in balancing your lights and diffusing/softening the shadows so that the object is evenly lit from all angles.
Direct sunlight provides uneven lighting around an object and casts hard shadows. These shadows need to be removed if you aim to extract PBR textures and relight your scanned object.
Unity’s delighting tool can remove shadows from your scans, but it does have limitations. In our experience there is no guaranteed solution, so it’s best to avoid direct light sources that cast hard shadows altogether.
Your only other option with sunlight is to soften the shadows with a light diffuser. To diffuse direct sunlight, you need some kind of diffusion material that is as large as the entire object you’re scanning.
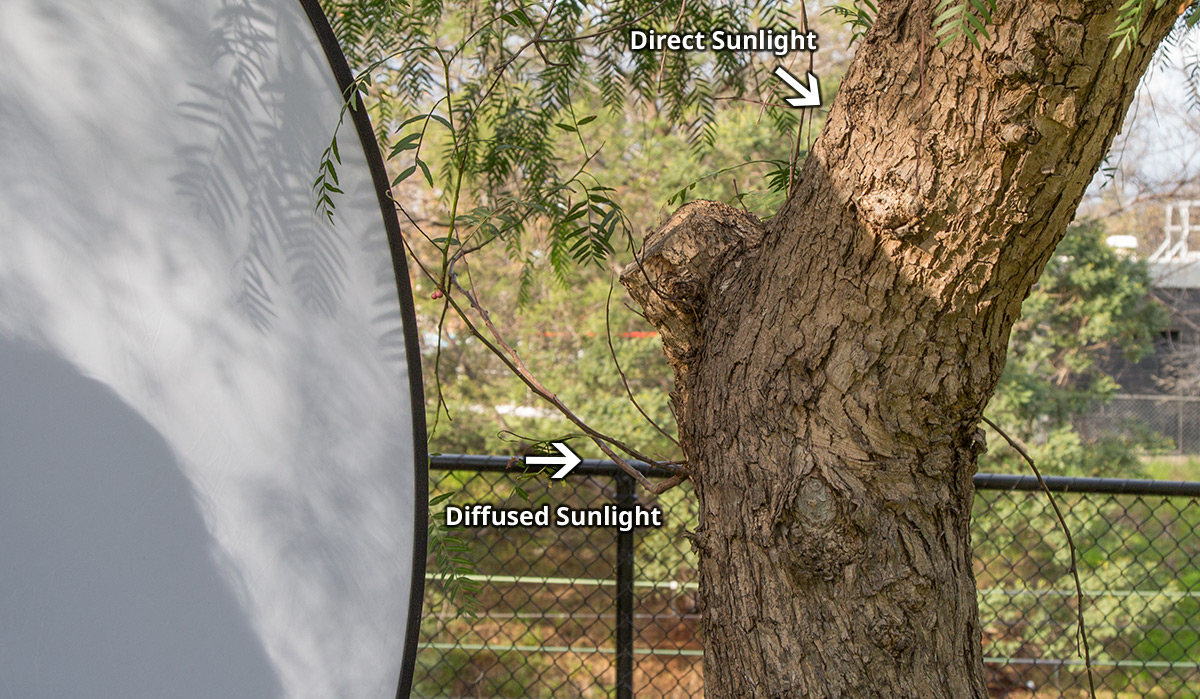
This may sound impractical for large objects like trees or cliffs, but luckily nature has you covered. Check the weather and schedule your trip for days with full cloud coverage.
Clouds do a great job at diffusing and scattering the sunlight all around your object. The soft and subtle shadows that you get from a cloudy day can be easily removed with baked ambient occlusion. In some cases, no additional work in post is even needed.
2. Avoid Partially Cloudy Days
The only thing worse than a sunny day, is a partially cloudy day. Photogrammetry requires many photos of an object at different angles. This takes time. If you’re capturing on a partially cloudy day, the lighting conditions will be constantly changing.
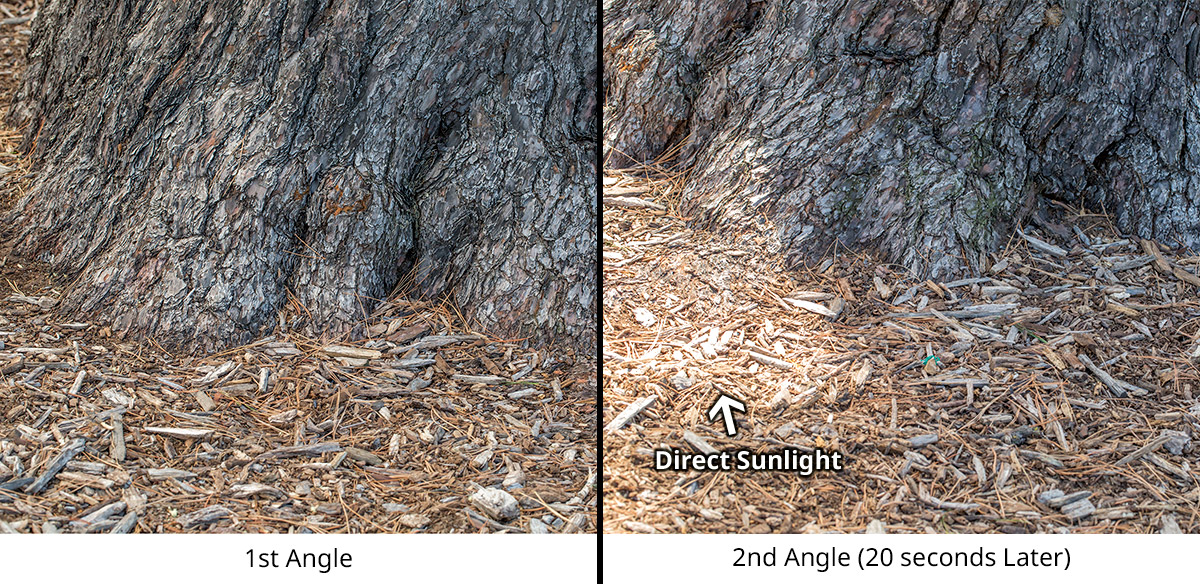
Your first photo may have perfect soft diffused lighting. Your next one may have hard shadows from the sun that just appeared from the clouds. This will give you wildly inconsistent results and your photogrammetry software may have trouble aligning all the camera angles.
3. Always Use a Tripod
There is no denying that handheld is faster and more agile than carrying around a tripod. But even with the best image stabilisation and ninja breathing skills, your images may never be as sharp and pixel-perfect as with a tripod. The sharper your images, the higher quality your scan and textures will be.
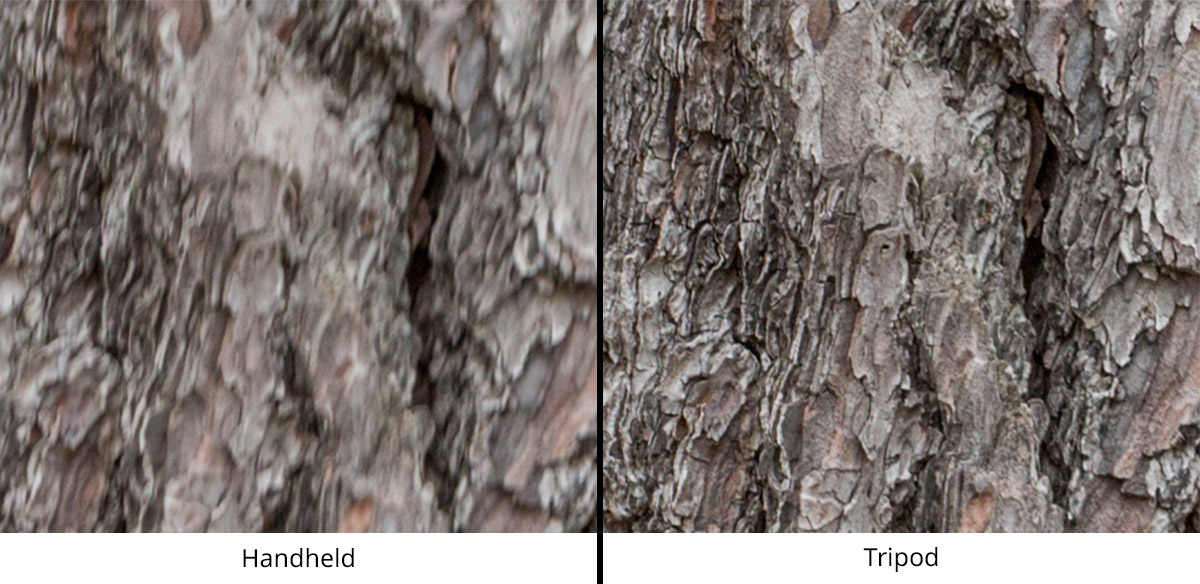
One major advantage to using a tripod is the ability to capture at slower shutter speeds. This means you can use a lower ISO for less noise, or lower your aperture size to reduce the unwanted blur from depth of field. This is especially useful for the dim lighting conditions on cloudy days.
A tripod can also be useful for measuring the distance between each angle you capture. As you move around an object, you can very quickly use the tripod legs to work out how far you should move to your next angle.
4. Fill the Frame with Your Object
No matter what camera you have, there is a fixed amount of pixels in each image. Don’t let these pixels go to waste. Frame up your object as close as possible so that it fills the entire image. The more space the object takes up in each image, the higher resolution your scan will be.

5. Capture the Right Amount of Overlap
The first step in photogrammetry is the alignment of all your images. The key to a good alignment is in getting the right amount of overlap across multiple images. A certain amount of your first image should be visible in the second image and similarly in the following images. Anywhere between 50% and 80% is a good range in most cases.
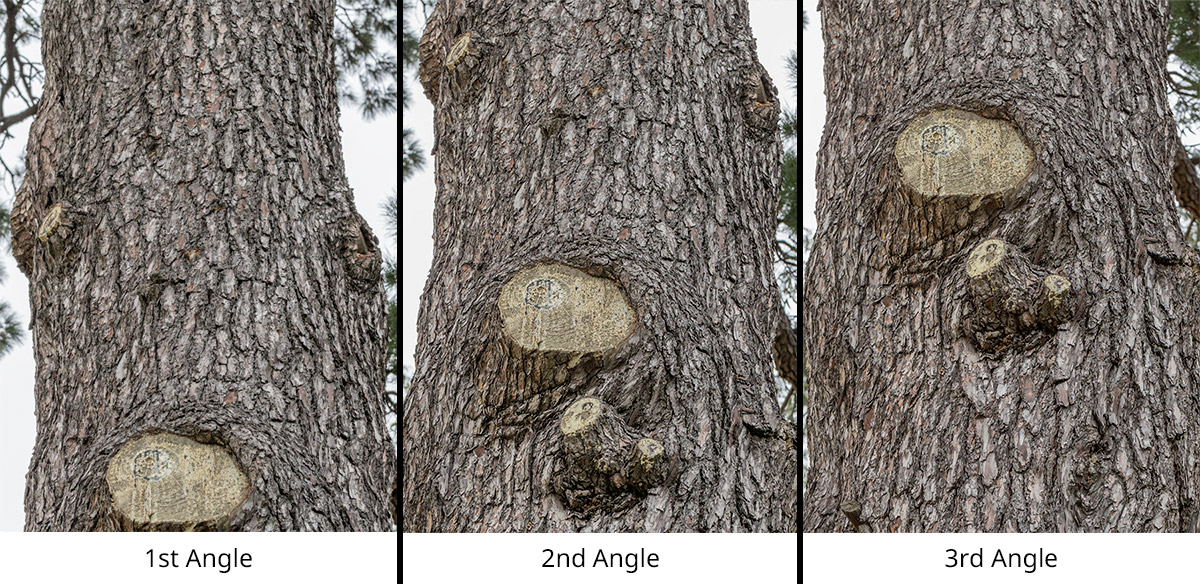
Anything above 80% means you need to take a whole lot more images for full coverage of your object. Since you don’t gain additional resolution from increased overlap, this can be a waste of time. Anything below 50% means you can take less images, but your software may have problems finding common tie points for alignment.
6. Partial/Spot Metering
Almost all modern cameras have built-in light metering with a few different metering modes. If your images have some of the background or sky visible, you shouldn’t be exposing for whole frame. You only want to expose for the object you are scanning.
Spot Metering will evaluate the exposure only in the centre of the frame, where your object should be. This will give you a more accurate reading of the light hitting your object and help you achieve more consistent exposures.

Some cameras also offer a Partial Metering mode, which is similar to spot metering, except the area that is measured is slightly larger. As such Partial Metering will give a more averaged exposure, but if your camera doesn’t support it, Spot Metering should work just fine.
7. Use a Small Fixed Aperture Size
Increasing the aperture size(smaller f-number) results in a shallower depth of field and more bokeh. This is good for artistic photography, bad for scanning. You want your entire object to be as sharp as possible.

The best aperture to use will depend on many things such as your specific camera and lens, the lighting conditions, etc. But as a general guide, try to stay above f8.0.
Whatever aperture you choose, make sure you stick to it for the entire capture. Every image should have the same depth of field.
8. Use Aperture Priority Mode
Getting consistent exposure across all your images is critical to an accurate scan and uniform textures. Most cameras have multiple exposure modes that will ensure consistent exposure. The best one for photogrammetry is aperture priority, often depicted with the Av symbol.
Aperture priority mode will automatically adjust the shutter speed to get an optimal exposure. This will let you keep a fixed aperture and ISO. It’s also faster to use than full Manual mode.
First pick a reasonable aperture size for the largest depth of field and let the camera determine the correct shutter speed. Since you’re scanning an object that doesn’t move, you can get away with slow shutter speeds. But it’s best to stay above 1/50 to reduce any minor vibrations caused by wind or movement of the camera shutter.
With that in mind you should also aim to use the lowest possible ISO. Finding the right balance between aperture, ISO and shutter speed comes down to practice with your specific camera and lens.
9. Check Exposures in Post with Histograms
After you’ve finished your capture the first thing you should do is an exposure check across all your images. The best way to read relative exposure is by looking at a histogram. Most photo editing suites have one.

The histogram of a correctly exposed image will depend on the actual colour and brightness of the object you are scanning. If your object is relatively flat and uniform, then the histogram should have a bell curve shape. A darker object should have a peak closer to the left side of the histogram and the right for a white object.
If you followed tips 6-8 and your object has a fairly uniform surface, the histogram across all your images should look very similar. Otherwise take the time to balance the exposures and match the histograms on all your images.
10. Use a Shutter Release Cable
This one is optional but can help a lot in getting super sharp images. Every time you press the shutter button on your camera, you are moving it ever so slightly. Using a shutter release cable takes your hands off the camera entirely.
Some cameras also have timer functions that delay the shutter release after your press it. If you don’t have a shutter release cable, this is a good alternative, but it is slower.
11. Use a Macro Lens
Macro lenses are often among the sharpest lenses available and usually come in longer focal lengths like 100mm. This generally gives a comfortable distance away from the object and less barrel distortion.
Macro lenses are also generally quite affordable and at higher apertures, they can be just as good as more expensive prime lenses.
Our go-to lens for 3D scanning and texture photography is the Canon EF 100mm f/2.8L Macro.
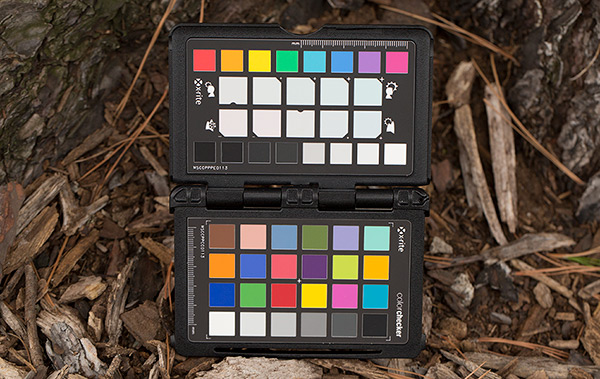
12. Always Use a Colour Chart
If you’re scanning the real world, why shouldn’t you also aim to get real-world colour? A colour chart is essential tool to getting accurate colour and is also useful for white balancing your images.
Colour charts come in various sizes. The best one for outdoor use is the X-Rite Colour Checker Passport. It’s compact and includes a decent sized grey card for white balancing. It also has a clamshell folding design that makes it easy to position next to your object.
13. Stay Focused and Move Quickly
When you’re outdoors, you are always at the mercy of the weather and nature. Capturing all your angles as quickly as possible gives you better chances of avoiding weather changes that can ruin your scan. Scouting the location and planning your capture ahead of time can really help in getting through a whole day of scanning without problems.
14. Takes Notes and Scale Reference
Taking notes of what you scanned and in which order will help to organise your images in post. This is especially important if you’re planning to scan lots of objects across multiple days.
You should also take measurements and note down the real world size of everything you scan. This will make it easy to scale your scans to the correct relative size later.
If you’re doing anything special for certain scans, such as using different lenses, neutral density filters, polarisers, then make sure to also record those in your notes.
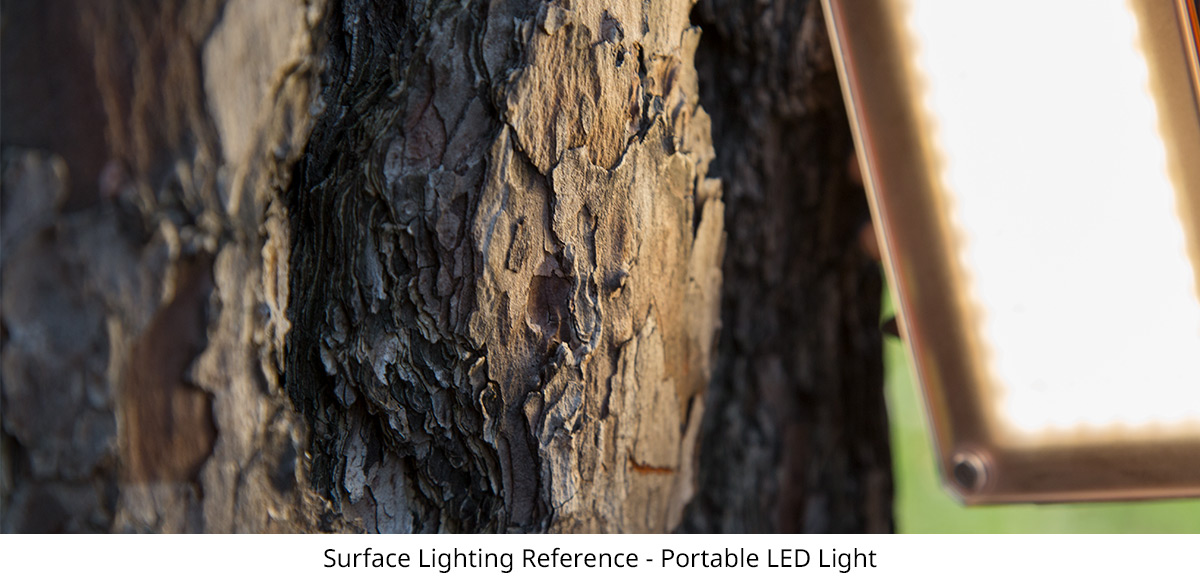
15. Surface Lighting Reference
There are various ways to create PBR textures from scans. No matter how you do it, taking surface reference of your object will help you calibrate and match your PBR textures to the real-world appearance of the object.
A portable flash or battery-power LED video light can be very useful for this. You should aim to take a few close up shots from different perspectives and shine the light at various incident angles to get good reference of the specular reflection across your object.